Integrating social media platforms like Instagram, TikTok, and Pinterest with Shopify is simple. But Facebook stands out by offering complete marketing solutions for Shopify merchants. Once connected, you can display your products and ads on Instagram and Messenger too.
In this guide, I’ll walk you through the process of creating and launching Facebook ads for your Shopify store. Plus, I’ll share some bonus tips to help new sellers get the most out of the platform and boost sales.
Let’s dive in!
Why Use Facebook Advertising For Shopify Stores?
Facebook advertising is one of the most powerful and effective tools for Shopify store owners looking to increase sales and drive more traffic to their websites. With over 3.07 billion monthly active users, Facebook is the biggest social media platform. So businesses can easily tap into this huge audience and promote their products.
Facebook provides advanced targeting options that allow merchants to reach specific demographics, interests, and behaviors. This means that Shopify store owners can display their ads to Facebook users who are most likely to be interested in their products.
Moreover, Facebook’s integration with Shopify makes it seamless for store owners to track conversions and evaluate the success of their campaigns.
How To Set Facebook Ads For Shopify (Step By Step Guide)
Setting up Facebook ads is a simple process, but beginners may find it difficult as it requires a business account and strategy to launch a successful campaign. Here’s a step-by-step guide for new merchants.
Step 1. Set Up Facebook Business Manager
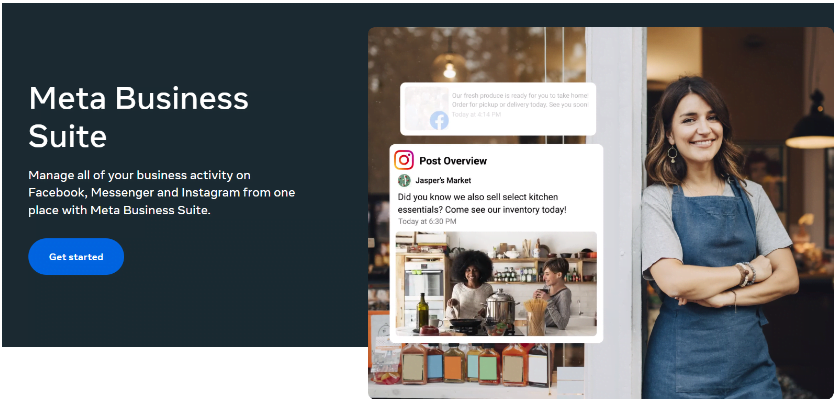
To get started with Facebook Ads, you need to create a Facebook Business Manager account (currently known as Meta Business Suite).
If you are new to Facebook, you can click Get Started and create a new business manager account. You will need to add your name, email address, and Facebook business page.

If you are an existing user, log into your Facebook account and create a business page related to your Shopify niche. Once your page is created, you can choose the Ads option from the left side menu to create Facebook ads. But you will need to do a lot of things before that. Let’s discuss it in the next section.
Step 2. Install Meta Pixel
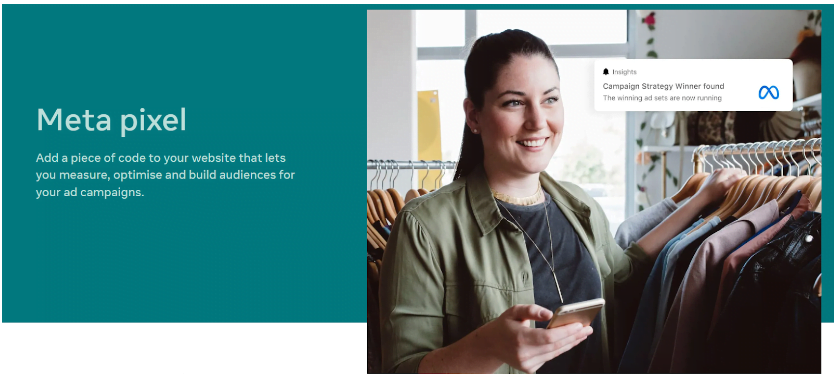
Now, you will need a tool that tracks and connects your Shopify website to Facebook Ads. This is where Meta Pixel comes in handy. But setting up Meta Pixel on your Facebook is quite a work.

There are two main steps to set up and install this feature:
- Create your pixel on your website to set up the pixel base code. If you have coding knowledge, you can add codes manually. Otherwise, use a partner integration for a pre-built setup for your website.
- Next, you need to set up events to measure the actions you care about the most. You can add codes manually or use partner integration.
After following this procedure, you can set up conversions API and install Meta Pixel. All these features are set up in Meta Events Manager. As soon as Meta Pixel is installed, you will get a 16-digit Pixel ID. Copy and paste it under the preferences tab on your Shopify store.
If you are still having difficulty setting up Pixel, check this step-by-step Shopify Meta Pixel setup guide.
Step 3. Create Facebook Audiences
In the next step, target relevant audiences for your Facebook Ads. Since Facebook has billions of users worldwide, finding interested buyers can be difficult. However, targeting the audience with Facebook Audiences is a piece of cake.
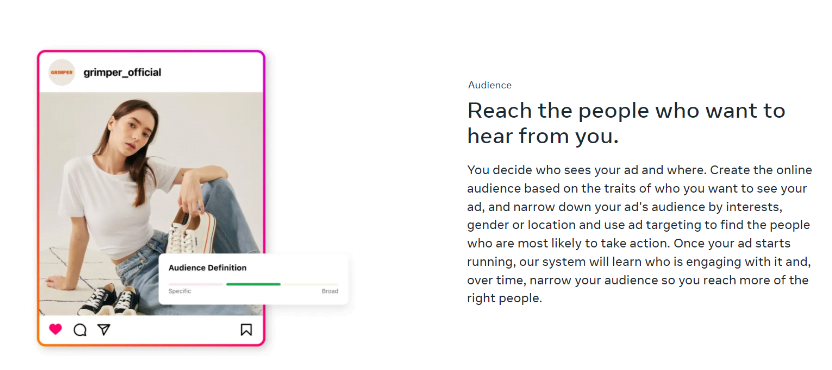
On your Meta Business Suite, you will find an Audience tab that lets you create a list of audiences with specific interests. You can define the list using different features, but two categories are widely used to target audiences, prospecting and retargeting.

Prospecting: New users can start with prospecting, as it allows you to find new customers on Facebook and Instagram. This practice involves targeting people who don’t know about your brand or haven’t purchased anything from your store yet. To target a new audience, you can use these two tools:
- The lookalike audience tool collects data from the custom audience or leads you already have. You can create an audience based on the likeliness and percentage of audience size who closely resemble your core audience.
- If you don’t have a list of website visitors and customers, use Facebook interests, demographics, and behaviors to create prospective ads. You can create an ad by adding the audience name, age limit, gender, language, and location.
Retargeting: As the name says, retargeting refers to targeting one-time purchasers and existing audiences to build a strong relationship. To create retargeting ads, Facebook offers different sources:
- You can upload a list of contact information, email addresses, and phone numbers using the Customer List feature.
- With the Website traffic feature, you can create a list of visitors and customers from your website. This common retargeting practice includes creating lists of audiences that visited in the past 30 days.
- The Catalog feature lets you create a list of people who have recently visited your product catalog on your website.
Step 4. Create A Facebook Ad Campaign
After creating an audience, you can start creating Facebook ads targeting them specifically for your Shopify products. Since all the setup has been done, let’s continue again from the end of the first step.
Open your Meta Business Suite account and click Ads from the left side menu. Then, click the Create Ad option to start with your new campaign.
Since you are creating a new ad campaign, you need to choose an objective from these categories:
- Automated Ads: To create personalized that are adjustable
- Get More Website Visitors: To create an ad to find relevant audiences on Facebook
- Promote Your Page: To create ads to promote your Facebook business pages
- Boost A Post: To create an ad to promote an organic post
- Local Business Promotion: Create ads for your local audience to promote your brick & mortar stores
- Get More Messages: To create simple click-to-message ads
- Get More Leads: To collect customer contact information from Facebook
Not every objective is relatable to advertising Shopify stores. Also, Facebook will charge you for every click and impression. So, choosing the right objective, such as automated ads, page promotion, and website visitors, is important.
Step 5. Choose Your Creative and Schedule
Now, it’s time to let your creativity bloom within your ads. Facebook advertising is not the same as other advertising techniques. Your ad has to be creative in order to grab the attention of the visitors. If you don’t want to spend too much on hiring a professional ad manager, you can take inspiration from Meta Creative Center.

Once your ad content is ready, you can schedule it before launching on Facebook. Here are some options you can choose to schedule:
- Start Date: Set the date you want to launch your campaign
- End Date: The date you want to end the campaign
- Daily Budget: Amount you want to spend on the campaign per day
- Total Budget: Your total budget for the campaign
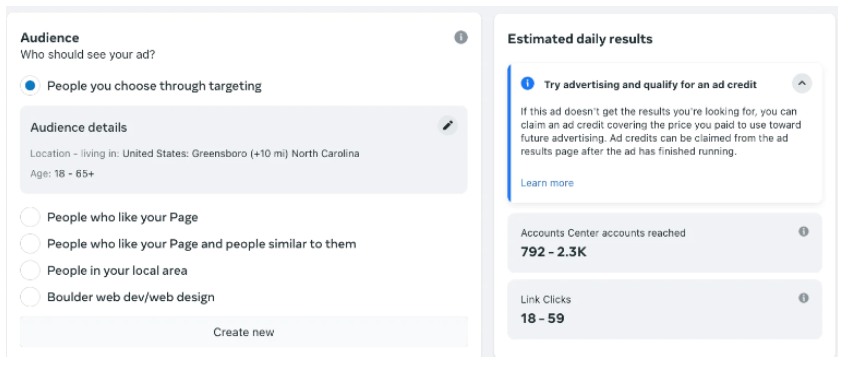
- Audience: Select the audience list you want to target
When you schedule the ad for your Shopify, it will show the estimated daily results for your campaign, such as how many people are likely to see your ad and how many links are going to be clicked. These estimates work as split testing, so you can carefully analyze them and set your budget accordingly.
Once everything is set, you can launch your ad campaigns on Facebook. Not only that you can place your ads on Instagram and Messenger as well. Clicking ads on these platforms will cost the same as on Facebook.
Step 6. Optimize Your Facebook Ad Campaigns
Finally, your Facebook ads for Shopify are placed, and soon, relevant people will start finding your ads. You will need to keep optimizing it so your ad provides more value to your customers.
Don’t try to increase your ad budget to get more sales. Wait to get more impressions (at least 1000) and its performance before evaluating for shutting it down or launching another ad for the same product.
Types of Facebook Ads You Can Set for Shopify Stores
You may have seen different types of Facebook ads in your feed. You can also create Facebook ads in your desired format. Here are some formats you can use:
- Video ads: Video ads showcase your brand and products in action, which is why they are the most engaging. These types of ads tell a brand story and express the value of your products almost immediately. Depending on your campaign goals, you can set up video ads in short clips or longer videos.
- Images: Image ads are Facebook’s standard advertising method. They are straightforward yet cost-effective. According to Facebook statistics, images have the highest level of engagement. They are easy to create and can be used to highlight specific products and deals.
- Collection: Collection ads offer an instant shopping experience, allowing users to browse multiple products without leaving the platform. This format includes images and videos you can show to your customers with a single campaign.
- Carousel: Carousel ads let you showcase up to 10 images or videos in a single ad with their own link. This format is perfect for highlighting different features of a single product or telling a brand story that develops across every carousel card.
How Much Does It Cost To Run Facebook Ads For Shopify?
The cost of running Facebook ads for Shopify products can vary depending on a number of factors:
- Target Audience
- Keyword
- Competition
- Ad Quality
- Time of the Year
Facebook is an entertainment platform first, so they don’t want their users to exaggerate with tons of ads in their feed. That’s why Facebook uses an auction-based system, so the advertiser who provides more value wins the spot. The highest bidder doesn’t win the spot every time, so other factors are also considered.
Depending on the competition, target audience, and type of ad, Facebook can charge $0.50 to $5 per click. But it is just an estimate. The real value will appear when you set the campaign for a certain niche and keyword.
However, there are many options for Facebook ads, such as CPC (cost per click) and CPM (cost per mile) models. CPC can cost a few cents, whereas CPM costs $10 to $30 per thousand impressions. Optimize and monitor your campaigns to ensure you are getting a good ROI.
Tips To Create Successful Facebook Ad Campaigns For Shopify
Here are some of the best tips and practices suggested by top marketing experts to get a good return on investment for your Facebook ads for Shopify.
1. Define Your Target Audience
Understanding who your customers are is crucial. Use Facebook’s targeting options to narrow down your audience based on factors like age, gender, location, interests, and behaviors. A well-defined target audience will help you create more relevant and effective ads.
2. Set Clear Goals and Objectives
Before setting up Facebook ads for your Shopify stores, it is essential to set your goals and objectives. Whether you want to boost sales or increase brand awareness, setting up goals will help you optimize your Facebook ads accordingly.
3. Use High-Quality Visuals
Visual content can make or break your ad’s performance. Use high-resolution images or well-produced videos that are eye-catching and represent your brand. Ensure that your visuals are aligned with the message you want to convey.
4. Optimize for Mobile
The majority of the audience uses Facebook on their smartphones, so it is crucial to optimize your ads for small devices as well. Keep your copy concise and make sure any images or videos are clear and easily viewable on mobile.
5. Test Different Ad Formats
Experiment with various ad formats to see what resonates best with your audience. You might find that video ads drive more engagement or that carousel ads lead to higher click-through rates for your store.
6. Use Retargeting Strategies
Retargeting allows you to show ads to people who have already interacted with your brand, whether they visited your website or added a product to their cart without completing a purchase. This can be a highly effective way to increase conversions.
7. Monitor and Adjust Your Campaigns
Regularly check your ads’ performance. Use Facebook’s analytics tools to track metrics such as click-through rates, conversion rates, and return on ad spend. Use this data to make informed decisions about future ad spending and campaign adjustments.
8. A/B Test Your Ads
Create multiple versions of your ads with different images, headlines, or calls to action to see which one performs better. A/B testing can provide valuable insights and help you optimize your campaigns for better results.
More On Shopify:
Conclusion: Facebook Ads Are Essential For Shopify Success
Setting up Facebook ads for Shopify stores may initially seem daunting. But once it is launched and you are getting conversions, you will admire the efforts.
Even if you don’t have coding or technical knowledge, the guide will help you set up your first Facebook campaign. Ads are a surefire way to reach your target audience, so create compelling and engaging ads. After all, you are spending money to approach potential customers.
However, don’t completely rely on ads or overspend beyond your budget. Aspiring sellers can take inspiration from top successful Shopify stores and find reliable ways to get organic traffic to your website.
Let me know if you have any other questions regarding this post or Shopify in the comments section.
FAQs
Facebook ads help Shopify store owners reach a massive audience, target specific customers, and increase sales with advanced tracking and conversion tools.
You need to create a Facebook Business Manager account, install Meta Pixel, define your audience, create a campaign, and launch your ad.
Meta Pixel is a tool that tracks visitor behavior on your Shopify store, helping you optimize Facebook ads and improve conversion tracking.
Use Facebook’s Audience tools to target people based on demographics, interests, behaviors, or previous interactions with your store.
You can use video ads, image ads, carousel ads, and collection ads to showcase your products effectively.

